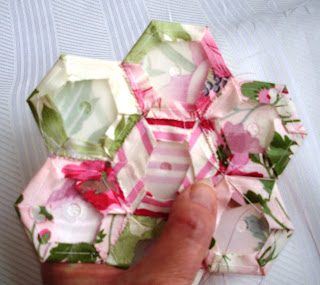
Now ... here is the tutorial on how to use the Mylar Hexagon Templates and for your stitches not to show and they really don't even if you have to use paper like I did because I was too impatient to wait for the Mylar Hexagons to get here in the U.K. from over the pond.
I will put my 2 blocks up as soon as I have finished stitching the second one. I've made the hexagons but they have to be stitched onto a background fabric and then hand quilted. The first block I made is dreadful but you will be able to see that for yourselves soon enough.
Here is the Tutorial and I am going to buy the plastic hexagons because even as a child I didn't much like cutting things out. Heck I didn't even like paper dolls!
Hexagon Tutorial with PLASTIC TEMPLATES
by Johna' Lee
of
The Scrappy Appleyard
Finally....Johna' Lee's 'Hexagon' tutorial
everyone has been asking for...
I do a lot of my sewing in the car while traveling...
so I rough cut my pieces out while in the car as well.
I cut the templates 3/8" larger all the way around the template.
Most people tell you to cut them 1/4" larger...
but with the plastic templates...
if they are cut out like that and are not dead on center...
the templates will start to pop out.
They tell you to cut 1/4" larger because
they are figuring on most people hand quilting this project when it is completed...
and any bigger than that leaves an extra layer of fabric to quilt through.
My solution....go in and trim up any excess.
Also...if you cut it at a 1/4" larger and don't have it completely centered...
you will have weak points in your quilt...
where it isn't quite a 1/4" seam.
Place a pin through the middle of the hole and back through
to hold the piece while you work.
Fold over the first corner until you have a crisp edge
and tack two tacking stitches.
(Just a basic whip stitch)
Now with the same needle and thread
travel over to the next point...
fold it over crisply...
and take two stitches at that corner...
Continue around until you come to the last point
before the edge where you started.
At this point take out the pin...
I then kind of pull it tightly
so as to pull out the indentation
from the pin holding the fabric and template together.
Go to the place you started...
take one more stitch
and knot off.
Now butt two templates up side by side
and whip together about 1/8" apart
starting at the very points of each hexagon...
DO NOT HOLD THEM LIKE THIS!!!
 | ||
| NO! NO! NO! |
Now I know I may offend other bloggers and hexagon hand piecers out there...
but this is my 'humble' opinion.
I travel across the country doing shows
30-36 weekends a year...
and I see all kinds of quilts.
99% of Hexagon Quilts....
have 'stitches' showing through to the front.
To me...
if one is going to go to all of this handwork...
the last thing you want...
is for your stitches to show through!
This is why I LOVE the plastic templates.
If you place them side by side and stitch them
instead of like the previous picture...
your stitches will NOT show through!
Add another petal to flower center and starting at the top like shown in the picture below...
whip stitch all the way down that template
as well as the previous petal you attached.
 |
| The striped piece is the Flower Center |
When you get to the last one...
it is a little bit funky to hold it...
but this is what I do....
I stitch the petal side to the center of flower
and continuously through the
adjoining petal.
Then I go back and stitch the sides of the first and last petal together...
finishing the flower.
Wa la....
Your flower is finished...
and you can start adding the pieces all the way
around it to make a path...
These little templates are addicting.
I love them because
they travel so easy.
Also...with the PLASTIC templates...
once you invest in them...
you never have to purchase them again...
or keep remaking them like the paper ones.
If you would like to order some to try out...
CLICK HERE!!!
Until next time ...
Lots of Love Patti xxx
American by birth and MOUTH but British in every other way
 -->
-->


OMG! Seriously? You mean I made a baby blocks quilt and did it wrong? lol! Thanks so much for the tutorial -- I'm going to have to try this technique now. I need to invest in some of those mylar pieces too. So cool! (And you're allowed to moan. :D )
ReplyDeleteStitching the hexis side by side is much better - thank you!
ReplyDeleteLOL at the moaning minnie comment--though I can absolutely understand why you're so frustrated!! I love piecing hexagons--though I do it the old way and have to admit that I'm so far into it that I don't know if I'd change now! I enjoyed the tutorial, though. My 17 yr old wants to do a hexagon quilt so will show her this way!
ReplyDeleteFascinating. Thanks for the explanation.
ReplyDelete